Damp and Flint Wall Surveying
Scott Enders surveying in Norfolk and repairs by https://limeandflint.co.uk/
Read about Scott’s journey through surveying a Flint building in Norfolk and repairs being undertaken by https://limeandflint.co.uk/
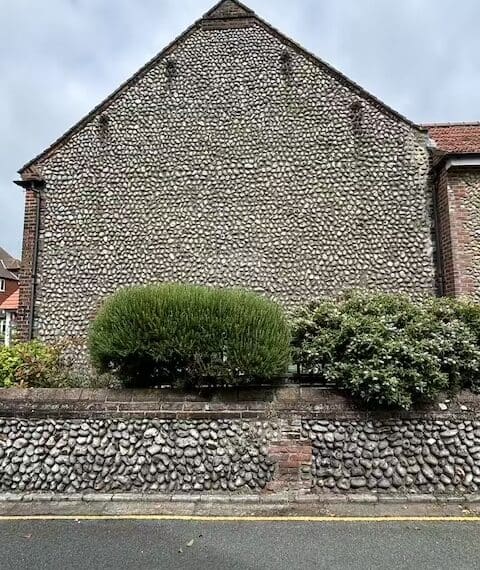
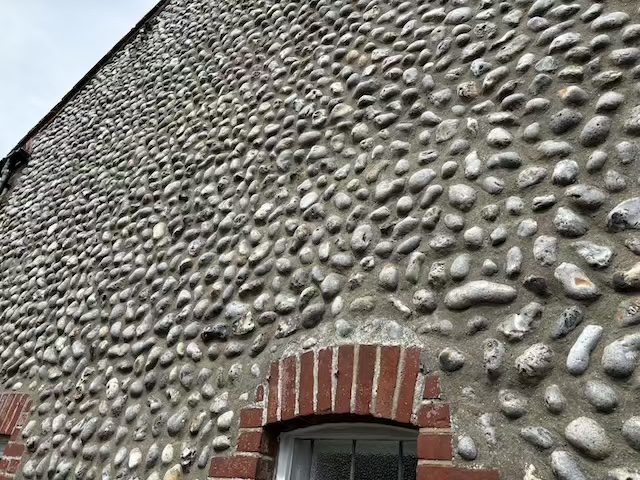
The gable end of the cottage, faced with cobbled flint.
We were called to a lovely Victorian cottage in Norfolk to investigate issues of dampness. The cottage was of solid brick construction, except for the gable end wall which was constructed of brick and flint, and faced externally with cobbled flint, often locally referred to as a ‘Norfolk Cobbled Wall’.
The owner had previously had a damp proofing contractor carry out works to try and address the damp issues, but unfortunately these were not successful. Over time, staining began to appear in various places around windows and door architraves. The client became concerned and asked us to investigate.
The Repairs !
Undertaken by Lime & Flint
The following works were undertaken;
- All cement mortar needed to be removed and the joints repointed with a lime mortar.
- The plasterboard and membranes from the walls needed to be stripped off, the walls dried out and then replastered with a lime plaster, decorated with vapour permeable paint.
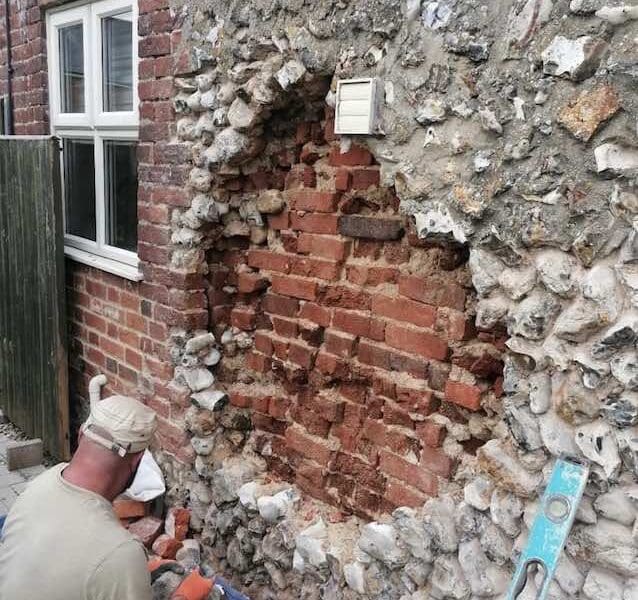
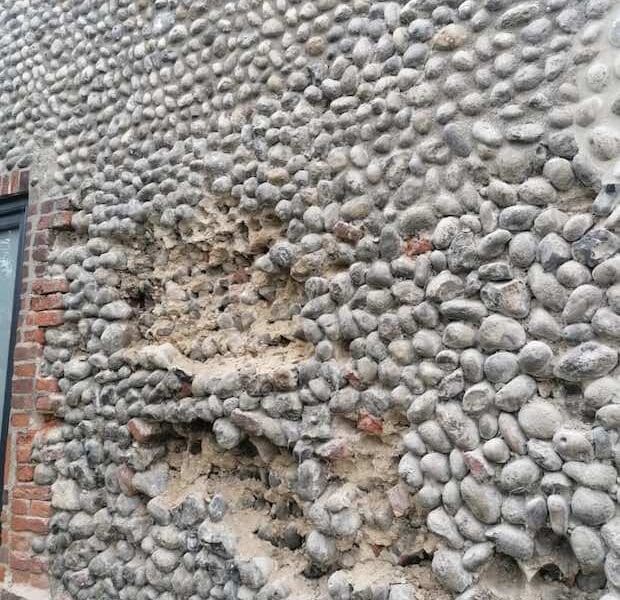
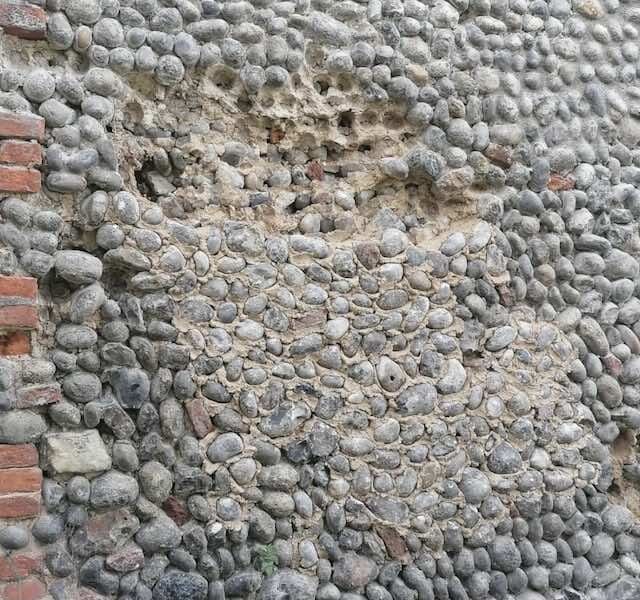
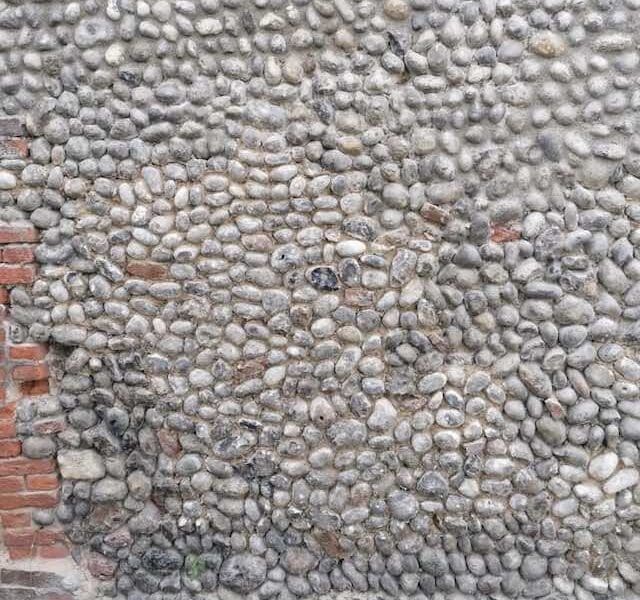
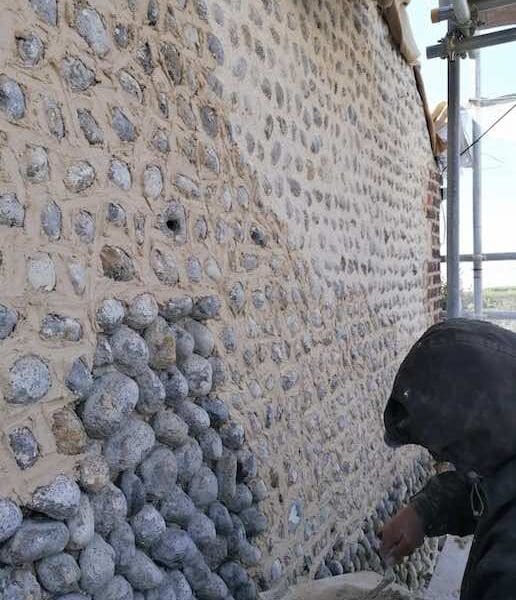
Removal of cement mortar from flint buildings such as this can cause problems. Removal can often cause damage to the walls, especially where the original lime mortar beneath has deteriorated. Below are some photos of Norfolk based contractor Lime & Flint undertaking repair works to flint walls where removal of the cement has resulted in partial collapse of the outer facing of flint. Flints can come loose as the mortar is removed and/or the original lime mortar is raked out. Unfortunately, the extent of this cannot be accurately predicted.
You can visit Lime & Flint’s website here:
Flint buildings should not be repointed in cement! That said, a careful assessment needs to be undertaken on whether it is deemed necessary to remove the cement, or if it is better to leave it in situ.
Works progression;
-
 Norfolk contractor Lime & Flint carrying out repair work to a flint wall following removal of cement mortar. The removal resulted in flints become loose and having to be removed and re-bed.
 -
 Another example. Photo by Lime & Flint
 -
 Works in progress. Photo by Lime & Flint
 -
 The finished works; flints re-bed in lime mortar. Photo by Lime & Flint
 -
 Works in progress. Photo by Lime & Flint
The problems !
Why the work was required ?
When we arrived, we found that the gable end mortar joints had been fully repointed with a hard and impervious cement mortar. Historically, the joints would have been pointed with a vapour permeable lime mortar which would take in water and later release it. This mortar is still present beneath the cement mortar. The cement has now changed the way the wall deals with moisture. No longer can the wall absorb moisture and release it; instead, any moisture within the wall becomes trapped and this is forced through to the inside.
We found cracking to the mortar in various places which was not surprising as cement is very rigid and does not tolerate movement well. It is the wrong type of mortar for this building and is not compatible with old flint walls.
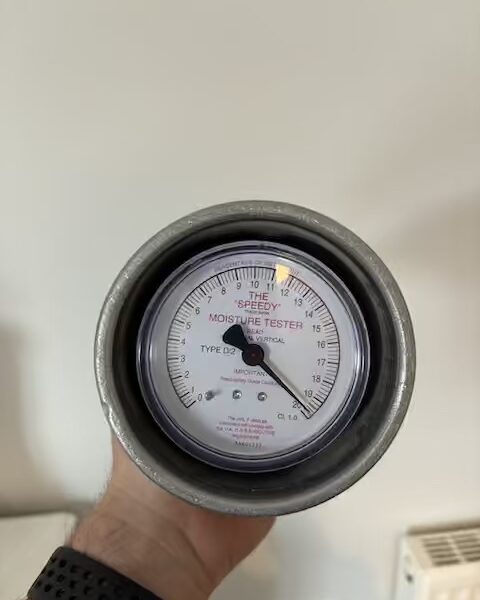
In order to investigate the cause of the staining to the walls internally, we needed to remove a section of the plasterboard and undertake a calcium carbide test on the mortar. This involves drilling out a sample of the mortar and mixing it with calcium carbide powder within a sealed vessel. A chemical reaction occurs between the powder and any moisture within the sample and produces acetylene gas within the vessel. The amount of gas produced is directly proportionate to the total moisture content (TMC) within the sample of mortar. As a rule of thumb, the threshold for lime mortar would be 2%TMC and anything over 4%TMC would be classed as damp at risk of deterioration and requiring action.
Calcium carbide meters are very handy for quickly establishing the TMC of masonry on site and the result of the test is produced instantly.
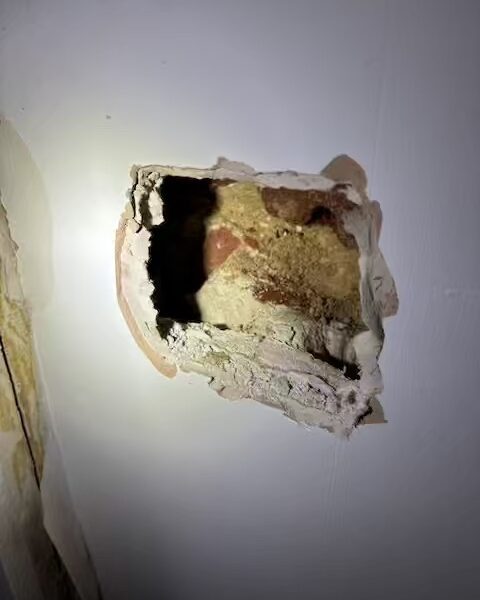
We cut out a square of plasterboard from one of the external walls on the first floor, in line with some of the staining. It transpired that where we removed the plasterboard, there was an adhesive dab which had turned to mush. This had sucked up moisture
from the masonry wall and transferred it through to the surface of the plasterboard, subsequently causing the staining.
We removed the dab and drilled into the lime mortar joints of the external masonry wall. The mortar was so wet that it clung onto the end of the drill bit.
We placed the wet mortar into the calcium carbide meter vessel and undertook the test. The result was so high that it almost went off the scale, as shown in the photo. The mortar was excessively damp and a result of just under 20%TMC was obtained.
We also placed a thermo-hygrometer within the wall void and the relative humidity was found to be almost at 100%. i.e. the air within the void was saturated due to excessive moisture evaporation from the masonry wall.
On the ground floor, it was found that the cause of staining around the windows was due to plasterboard being fixed around the window reveals directly onto the damp masonry using adhesive dabs. Elsewhere, there was a membrane beneath the plasterboard so the moisture had not managed to get through to the surface.
We concluded that the cement mortar to the external joints had trapped moisture within the wall and forced this through to the inside. The internal works carried out previously (lining the walls with plasterboard and membranes) was not an appropriate response and simply concealed the damp issues, rather than addressing the root cause. The works previously carried out did not work due to poor installation and detailing.
-
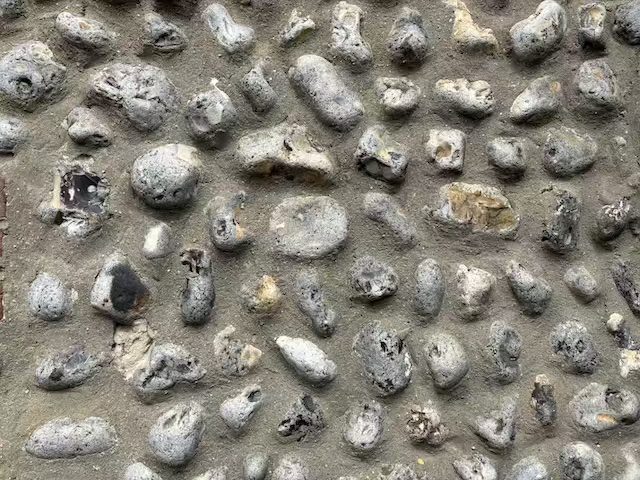
 Gable end has been repointed in a hard cement mortar.
 -
 Gable end has been repointed in a hard cement mortar.
 -
 Square of plasterboard cut out to reveal adhesive dabs turned to mush and wet mortar to the joints.
 -
 The mortar was so wet that it clung onto the end of the drill bit.
 -
 Calcium carbide result of just under 20%TMC obtained.


